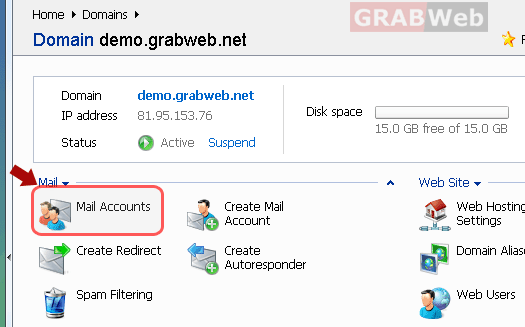
جهت ساخت ایمیل مراحل زیر را انجام دهید
1- وارد کنترل پنل هاست شوید
2-بر روی ایمیل اکانت کلیک نمایید
3-ایمیل مورد نظر را بسازید
4- مسیر چک کردن ایمیل به شرح زیر است http://domain.com:8425
به جای domain.com نام سایت خود را قرار می دهید

5) Click "Create Mail account".

6)Your domain name is shown to the right of @ sign, so you only need to specify the desired name for the email account you want to create.
This can be, for example, user's first name and last name separated by a dot ( will.smith@ ), a department name, or any other text in Latin symbols. The name should be short enough to remember. It can comprise alphanumeric, dash dot and underscore symbols.
7) Specify a password that mailbox owner will use for accessing his or her mailbox.
8) To allow the mailbox owner to manage his or her mailbox through a mailbox administration panel, select the "Control panel" access check box and specify the language for the user's control panel.
9) Make sure that a check mark is present in the "Mailbox" check box.
10) If you want you can limit the amount of disk space that this mailbox can use. To do this, under "Mailbox quota" select "Enter size" option and type the desired value in "kilobytes" else the "default quota" will be set as per the domain limits.

11. To allow the mailbox owner to configure and use spam filter and anti-virus, click "Next", select the respective check boxes and click "OK".

NOTE:- If you are sure that your spam filter is accurate, then you may check the checkbox for the setting "Delete spam mail when it comes to mailbox" as it will automatically delete all incoming messages recognized as spam.
12. Click "OK".

NOTE:-Now, the mailbox is created, and a separate e-mail administration panel has been set up in Plesk. To enter it, the mailbox owner should visit the URL https://yourdomain.com:8443, type his or her e-mail address into the Login box, type the password (same password that was created for email address) for the mailbox into the Password box, and then click Login.
